I have been getting requests from testers of mine and those following my newly released patterns, to include a tutorial on the magic circle. I know there are other ways to do this, but this is the way that works for me. For me, after all the searching I did when I first started, this was the most simple to maneuver in my hands and the steps are easy to memorize. The only difficult part is figuring out where everything goes and HOW to maneuver it. Once you figure that out it will come easily to you. I am right handed, so this is a right handed tutorial. I am performing single crochets, but I give instructions for the half double and the double crochet as well.
A hint: This takes practice. It takes the human mind 6 times to repeat something before it can retain it effectively on average. 🙂 It would help if you just swung the yarn around your hand a few times and just practiced the steps over and over before you really started. I think I spent a few hours just wrapping, crocheting, unraveling and starting again.
So without further ado… the Magic Circle Technique:
The Magic circle is a technique used when starting to work something in the round.
Hats or any shape that lays flat even, but are crocheted in the round are started in this way.
See Working in the Round for more information on other methods for starting your round.
For my video for completing the magic circle technique visit here: Articles of a Domestic Goddess Magic Circle Tutorial
or view it here:
Photo Instructions:
Start by holding the yarn in your left hand like this.
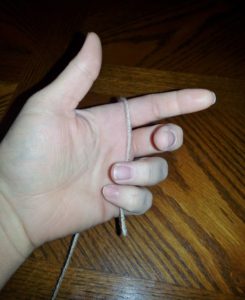
Wrap the working yarn around your forefinger and middle finger on your left hand. (More detailed pictures of this wrap below.)
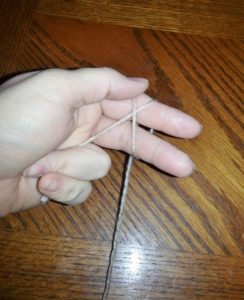
Here is that same hold shown more loosely so you can see exactly how it’s wrapped and how I hold it. Hold the working yarn between your pinky and ring finger to keep it tight.
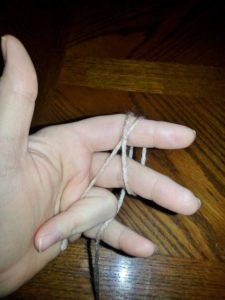
This is what it looks like from the top when you grasp it a little more tightly. This is the tension I use to complete this technique. Tension is the trick to this. Remember to always hold between the pinky and the ring finger back there to ensure proper tension.
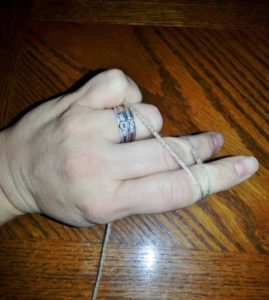
And now we begin. From the top of your hand, insert your hook under the first loop around your fingers, and grasp the second loop.
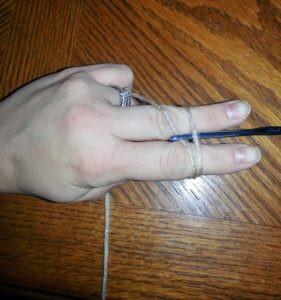
Drag it through.
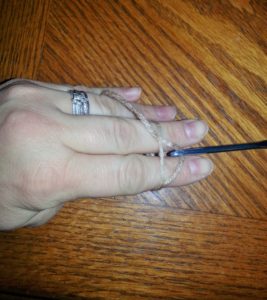
Grasping the loop you just pulled through, turn your hook down and then facing you and up so that you now have a new loop on your hook.You’re essentially just twisting it so it holds taught enough you can do something that will hold it into place. If you let it go now it will fall apart.
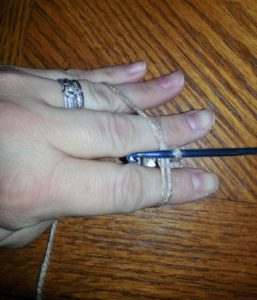
This picture I took to show you how tightly I hold the yarn when I am actually performing the magic circle technique. It really needs to be this tight to work. Remember to always hold between the pinky and the ring finger back there to ensure proper tension.
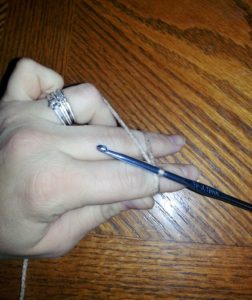
Now, yarn over around the working yarn that you’re holding between your pinky and ring finger….
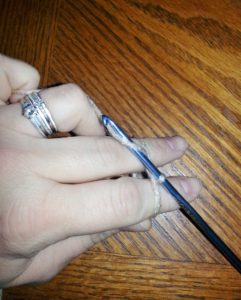
… and pull through to complete your first chain. This does not count as a first stitch. This is only to secure the circle so that you don’t have to hold so tightly and can begin your stitches.
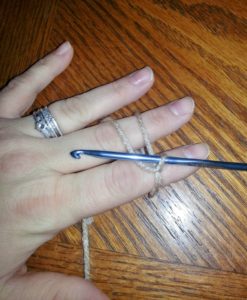
Slip the loop off your fingers and hold it this way. Your pinky will hold the circle against your ring finger so that you may complete your stitches and the circle doesn’t just flop everywhere. If you’re performing single crochets, just complete them like normal around the magic circle loop as if the magic circle is your stitch. All stitches are completed inside the magic circle and around the magic circle loop. (More detailed pictures below)
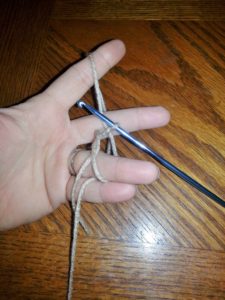
(If you’re performing half doubles, you want to chain one for height before you start you actual stitches. Double crochets, chain 2 for height before you start your stitches. Always join to the top of the first stitch, not your chains for height.)
Here is my first single crochet completed around the magic circle loop.
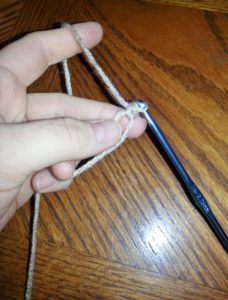
And here are my 5 single crochets around my magic circle loop. Notice that the tail is going to be inside.
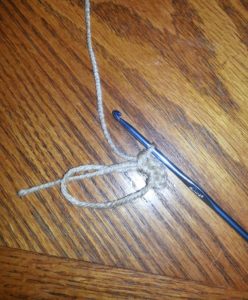
I pull it out before I start.
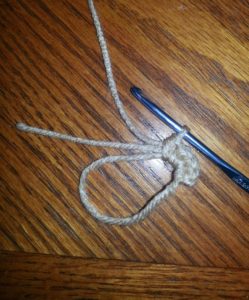
Pull the tail and it will tighten.
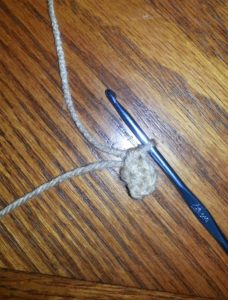
(I think some people slip stitch into the first stitch before they pull the circle taught. I do it this way, but I believe it was easier for me to put my hook into the top of the first stitch, pull it tight and then complete my slip stitch when I was first starting out.)
Join to the top of the first actual stitch you made. (If performing the half double crochet or the double crochet in a magic circle, make sure you are not slip stitching into the chains you made for height. Stitch markers might be helpful until you get the hang of it.)
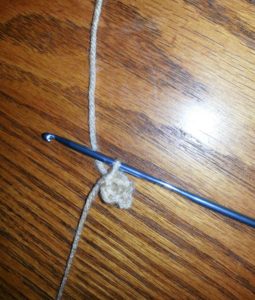
So that is the way that I perform a magic circle. If you have any questions, feel free to comment below or message me @ The Articles of a Domestic Goddess Facebook Page and I would be happy to help you in any way that I can. Happy hooking!


